Saturday, May 28, 2011

Pillars of Strength

Whew!  What a busy time of the year!  We’ve had a birthday, a graduation, light fixture shopping, an Eagle Scout ceremony, exams, the return of a son studying abroad, tile shopping, honors nights, column height monitoring, a softball tournament and ….

… another storm.

P1160670

Happily, we lost no trees in this latest storm, but it was scary.  A block away a tree top snapped off and landed on a small car with two women in it, killing them.

That helps put things into perspective -- like columns that are 6 inches too tall.P1160607

The tall column in the back was meant to be built so that the flare out at the top began just at the height of the fence pickets, like this:

P1160614

But instead, it has two extra bricks in it before the flare, so that it lines up like this:

P1160611

I was not happy.  I’m afraid I even used the “s” word.  It was hard to be polite and I’m not proud. But I still think the extra 6 inches on top of a 10 or 12 foot wall looks stupid.

Undaunted, the masons moved on back and continued the columns on the curved wall.

P1160642

Once they got it up tall enough, Louie showed them how do it – at the right height.

P1160649

I was wondering how the back of these columns would look, since they are essentially “V” shaped.  This one looks fine.  This way the fence has a nice edge to tie into both on the straight part and the curved part.  The beagle approves.

P1160658

Meanwhile, back inside I had more trim decisions to make.  On the main floor, I wanted plinth blocks.  The carpenters asked me if I wanted it to be the full width of the block like this:

P1160589

or trimmed down like this:

P1160590

I definitely like the narrower one better. 

Then they asked me if I wanted them to round of the top of the block with the router.  I suggested we try a piece of the ledger mold on top of the plinth block instead.

So, they made a sample door.

P1160603

I liked it!  So we went with it:

P1160639

P1160660

Meanwhile, back outside, we had our garage door installed.

P1160549

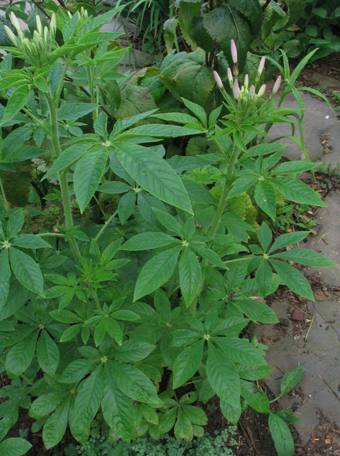
And the Cleome hassleriana is blooming.

P1160665

I’m thinking of collecting the seeds and having a whole field of them on the septic drain field.  Wouldn’t that be pretty? (And fun?)

Thursday, May 19, 2011

Going to Pot

P1160524

This plant caused a lot of excitement on the job site today.

I noticed it while we were watching Jason demonstrate his stucco technique.

P1160523

I asked Louie if he had planted it and soon everyone was bent over inspecting it.

P1160526

At first they were absolutely certain that it was an illegal weed. They felt it, smelled it and were certain it was the real deal. I had several offers to remove the offending plant.   But as soon as they decided that it was just a look alike, they lost all interest and went back to building their columns.

P1160521

It could’ve worked out for us, though, considering that Terry from Metropolitan Irrigation came out yesterday and set us up with a temporary irrigation system for the hollies and cedars.

P1160518

From the looks of the finished columns, I don’t think anyone tried any funny stuff with the funny stuff.

P1160532

I think the columns look good coming and going.

P1160538

P1160542

Of course once I got back to my computer, being naturally curious, I had to find out what our exciting plant is.  I do believe it is Cleome hassleriana. (photo credit Robsplants.com)Cleome hassleriana        

Put that in your pipe and smoke it.

Tuesday, May 17, 2011

A Turn in the Right Direction

When it started raining yesterday, Jason the Mason wanted to move inside and work on the living room fireplace.

P1160387_1903

I had become enamored with the idea of having a herringbone hearth in the living room. I went on an internet search of inspiration photos, but it was tough. There are lots of photos of mantels and fireplaces, but it’s hard to get a glimpse of a hearth.

I found this one. It was a little contemporary, but I liked that the hearth wasn’t too deep. I also liked the slanted bricks above the firebox in the surround.

I had gotten these awesome wood mold bricks contributed to the cause out of the extras from a beautiful house that was built in the 1980’s. We started messing around with a brick pattern.

P1160464 This was pretty much what we thought the hearth in the picture looked like. But then we came to a critical point. With only two rows in the herringbone pattern, it looks like a series of arrows. It starts to look like a secret symbol from The DaVinci Code: this way.

The question was which way? If the arrows point one way, they point to the bedroom and if they point the other way, they point to the kitchen – and the laundry room.

P1160470

Louie looked like he had a plan as they began to work on the surround.

P1160478

They squared up the hearth,

P1160482

put down a mesh base,

P1160483

laid out the border,

P1160484

and avoided the question altogether.

P1160486

Even though it meant cutting and fitting more little triangles of brick, they turned the herringbone pattern 90 degrees and had the arrows going front and back.

P1160487

Jason put in the final piece and they cleaned it up.

P1160493

This is how it will look as you enter the living room. It still needs to have a mantel build around it and the grout needs to dry to a lighter color, but I think it looks pretty good for a gas fireplace. It’s a step in the right direction.

P1160494

Now I just need to put this image out on the internet for others who want a herringbone hearth and can’t find any pictures.

Monday, May 16, 2011

The Adoration of a House

P1160352_1902

This is the first door hung in the house.  I was so excited to see it.

P1160354_1913

It was hung by the trim masters.

P1160357_1910

From the drawing on the wall, I thought they were going to make  a replica of Stonehenge, but they came through for me.

P1160358_1909

Just what I wanted.

P1160383_1885

As they worked their way through the basement with baseboard and door casings, the house started to really look like a house.

P1160469

The patchy walls and two toned trim does look a little funky right now, but once it’s all painted, it’s going to be great!

P1160467


Meanwhile, the masons have been busy, too. 

P1160351_1907

These guys started on opposite ends of the curved wall and worked toward each other until they met in the middle with their wall cap.

P1160377_1889

Santa, aka Louie, had to eyeball this one, because you can’t pull a line on a curved wall.

P1160371_1894

They also got a start on the columns.  They needed a drill to drill into the concrete wall to set their wall ties, so they stopped at this point.  I was glad they stopped.  I wasn’t sure that the column was going to look right.  I had my favorite rock star come look and she assured me that this plan would give the column enough visual weight to balance the house. 

P1160473

Then the masons had the new guy with the mortar bag fixing up those gap toothed arches.

P1160381_1887

It looked like tedious work, but he did a great job!

P1160374_1879

What a great framework for the gardens!  I can’t wait to get planting!

Tuesday, May 10, 2011

Trimming the Budget

image

After we sorted through all the permutations of trim that we could think of and consulted the trim recommended by our esteemed architects, we made our selections and waited for the bids to come back.

P1160172


P1160174

They were …. breathtaking.  The numbers were too high to fix by haggling over price.

After studying the bids for a while, the culprit became clear.  Almost half of the bid amounts were for door and window casing, so the solution was pretty obvious:  simplify the casing.

This is basically what we started out with.

A simple bead and a back band were simply too expensive.  We did a few quick calculator tricks and figured out that if we went back to the door trim I was initially drawn to:

P1150876_1572

we were magically back within the budget.

My only question was if going from one to the other

would look ok on a two panel door.  I found some reassuring images and away we went. 

(Okay, eggplant walls aren’t that reassuring. For more reassurance, see this)

And speaking of those two panel doors,  some of them were delivered today, so I had my wee tiny son try them out for size.

P1160317

Seeing him in the frame of this 6’8” door made me glad that we had decided to go with 7’ doors in the upstairs and the basement.

P1160316

He didn’t seem to like the 6’8” door,

P1160318

but the 7’ door was juuust right.

It was kind of like Goldilocks only he’s more like one of the bears.

And speaking of just right, the floor to the porch started going on.

P1160333

I’m so excited to be able to walk out on the porch at last, and I think the floors and the fireplace look great

P1160335

The fireplace is just the right height for sitting but not too big to arrange some porch furniture around.

P1160344

I had to run down and see how the v-groove effect looked through the floor joists from below.

P1160321

I think it’s an awesome “ceiling” for the party pavilion/carport.

P1160323

It was all made possible by Gary’s inventive idea to flash the edges around the brick and use the 2x6’s for the floor boards.

P1160334

Pretty flashy, huh?